Tuesday, December 25, 2012

Rosemary Chocolate Cranberry Pistachio Shortbread Cookies


Every year I make cookies for the holiday. This year, I did not have time to make more than one type, but I think this is my cookie of the year! Not your typical shortbread. The idea was inspired by a decadent chocolate rosemary ice cream flavor I had at The Bent Spoon in Princeton, New Jersey, where you will find unusual flavors of homemade ice cream, delicious cupcakes, and other baked goods. These cookies smell like Christmas while baking with rosemary, pistachio, and cranberries and a slight chocolate flavor. 


Ingredients

1/4C butter (½ stick) 
¼C confectioners sugar
1 C flour
dash salt
1/8 teaspoon baking powder
2 tablespoons cocoa
chopped dried cranberries (~ 2 tablespoons)
Chopped Rosemary (~1 ½ tablespoons)
Chopped roasted/unsalted pistachio meats (~1/8C)

Soften butter, blend in sugar, followed by flour, salt, baking powder, and cocoa. Mix in cranberries, nuts and rosemary. It easier to mix by hand at this stage to ensure that all ingredients are well blended.

Roll into log about 5/8 inch in diameter. I flattened the sides to create a square or a rectangle shaped cookie. Wrap in plastic wrap, and refrigerate overnight, or for at least two hours. Cut into ¼ inch cookies. Bake for about 9-11 minutes until edges look slightly brown. 


Merry Christmas & Happy New Year! 

Monday, December 24, 2012

Spiced Caramels


Tis the season for candy, cookies, and plenty of holiday treats! Caramels make a great gift any time of the year. I made these spicy caramels in October when the flavors of cinnamon, nutmeg, and ginger seem to fill the air.  It was just over a year ago when I made my first unsuccessful attempt at creating caramels. I had used some leftover candied spaghetti squash from my Candied Spaghetti Squash Tart recipe and ended up with squash candy instead, which I later learned is a traditional candy in Mexico. While the candy was good, I was determined to successfully make caramels without fail. This time, I decided not to wing it and referred to the ginger cinnamon caramel recipe I previously found on thekitchn. I tripled the recipe to make caramels for a large gathering. I also added nutmeg, cardamom, and a little more butter. They were unfortunately not ready in time for the party due to the larger quantity and extended cooking time. The pot I used was not big enough (even though it looked like a caramel cauldron!), and a caramel overflow occurred at various times during the cooking process. This added a little extra time. Luckily, I learned that baking soda combined with a little water cleans it up very nicely! Plus, it was worth the cleanup. The caramels came out perfect. Creamy, soft, buttery with lots of flavor from the spices, but not overwhelming.  I had so much caramel left over that I also made some caramel chocolate shortbread bars with a basic shortbread recipe and some Taza ginger chocolate. I also coated some apples with the caramel. If you have a little time over the holiday and want to impress your family and friends, this recipe is sure to please! The trick is to be patient during each phase of the cooking process. You will notice that the temperature on your candy thermometer (I do not recommend making this recipe without a candy thermometer unless you are a candy making expert) will stay at a certain temperature for what seems like hours, but it will slowly increase... just be patient. It is worth the wait! I shared some caramels with various friends and family. My total yield was well over 400! You may not need as many... Have a fun time making them!

Ingredients (x3 in my case!)

2 cups heavy cream
3 1/2 cups sugar
1/2 cup light corn syrup
1/4 cup water
1/4 cup unsalted butter, cut into chunks (I added a couple more tablespoons)
3 teaspoons fresh-ground cinnamon

1/8 teaspoon of nutmeg  
1/8 teaspoon ground cardamom
4 teaspoons powdered ginger (recipe called for extract)
1/2 teaspoon salt


Instructions

Line a 9x13 baking sheet with heavy-duty foil and butter generously. Put the cream in a small saucepan and let it warm over low heat.
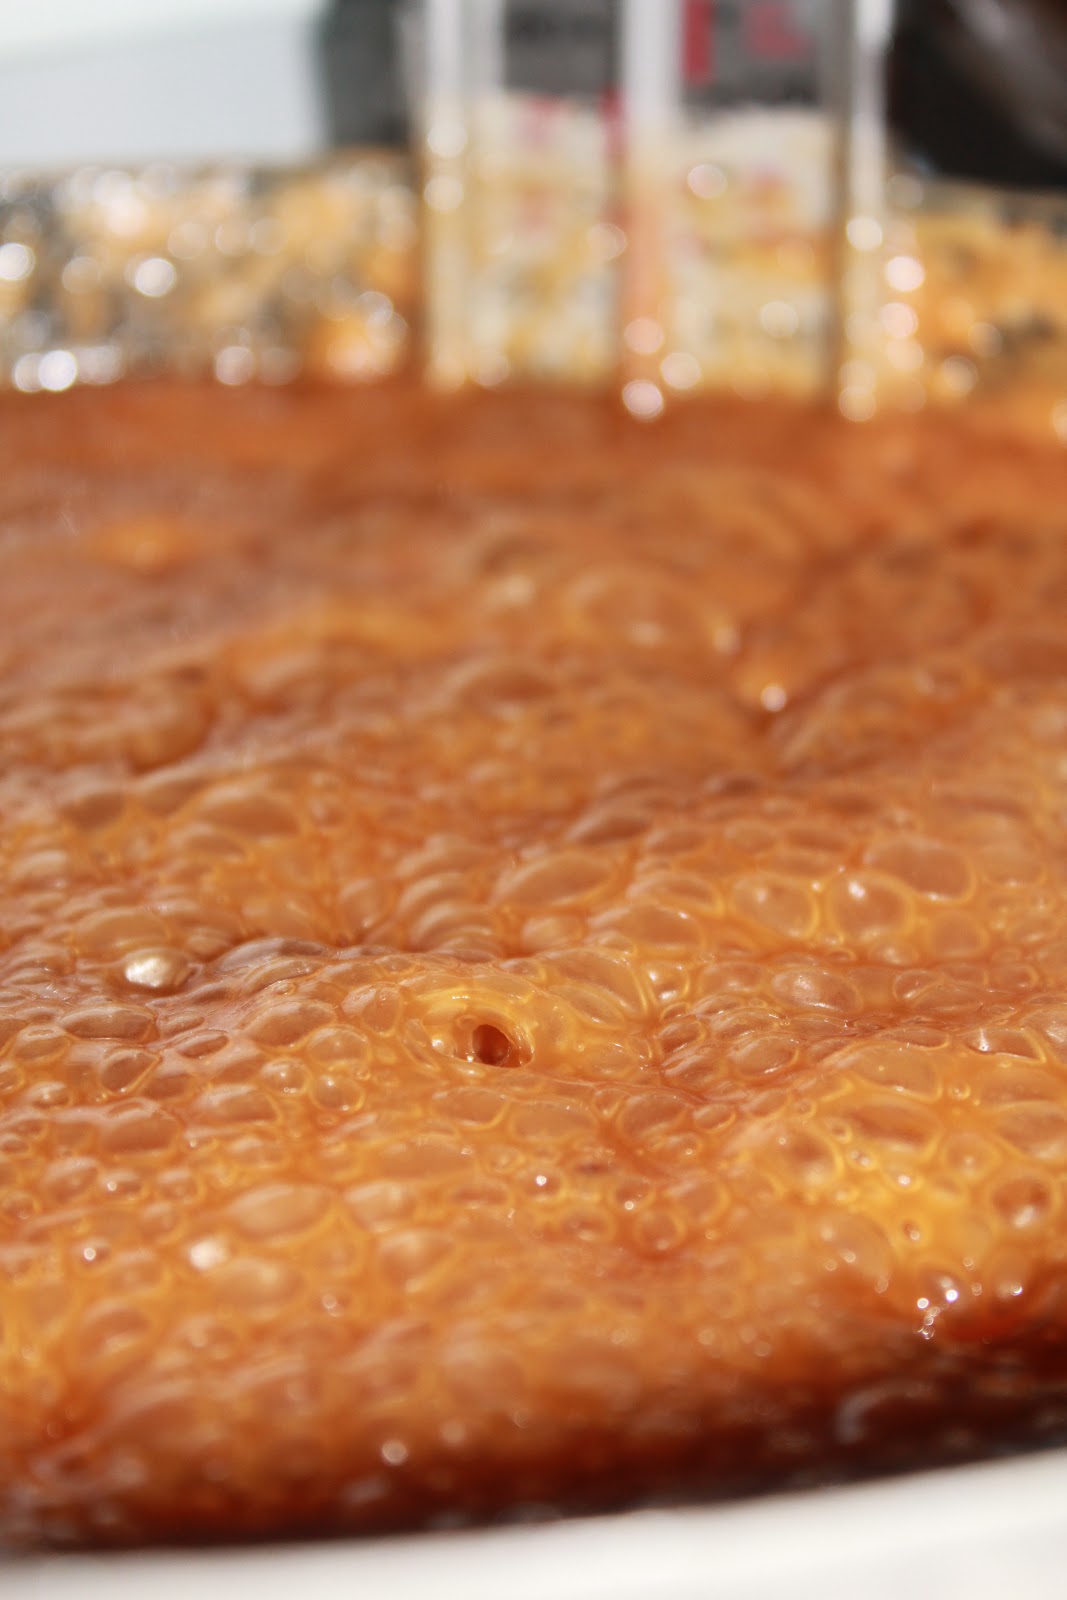
Put the sugar, water, and corn syrup in a large, heavy pot over medium-high heat and stir vigorously until the sugar melts and dissolves. Stop stirring and turn the heat to high. Cook until the sugar turns dark amber. Take off the heat.
Whisk in the butter. VERY CAREFULLY pour in the cream and whisk it. The caramel will bubble up furiously and steam. Whisk until well-combined and return to high heat. Bring to a boil, stirring, then turn the heat to medium-low. Clip on the candy thermometer and cook until the temperature hits 250°F. Remove from the heat and quickly whisk in the ginger extract, cinnamon, and salt. Pour into the prepared pan and let it cool.
Being a scientist, I made careful observation as to the changes in consistency, color and viscosity. Unfortunately, I misplaced my notes. Before each temperature increase, there was a 'boiling over' of the caramel. At this stage I would turn the heat down a bit to prevent overflow and a messy stove. This added more time to the cooking process. Next time I will use a bigger pot. You will notice a change in color and consistency in the photos. 

When the caramel has cooled for a couple hours, put it in the fridge to harden overnight. The next day, cut into small pieces and wrap. I stored a giant slab of caramel between sheets of waxy paper. It was pure joy seeing it in the fridge. 


10 1/2 Cups sugar


mmmm....butter

About to overflow

Not quite

Preparing the spice mix

So much waiting...

Almost..

Starting to look like caramel
Just about to boil over...
250F! Finally!!


My niece helped me with some of the wrapping (and eating!)


The caramel is very easy to cut and form into any shape


Each caramel was wrapped in wax paper. 

Some of the caramels were dipped in chocolate! These were gone in minutes.
Shortbread for the chocolate caramel shortbread bars
Taza Ginger Chocolate

Caramel and chocolate poured on top of the shortbread

The bars were very delicious!

Caramel apple


Enjoy!

Saturday, September 1, 2012

Bacon and Leek Scones


Today happens to be Bacon Day! Every Saturday before Labor Day, bacon lovers unite to celebrate! There are fun events taking place across the US including; Bacon Festival in Hudson, NY, chocolate covered bacon and sweet treats by Peterbrooke Chocolatier in Winter Park, Fla. My very first Nomsense blog post, 'Chocolate Chip Cookies with Bits of Bacon!' was inspired by Bacon Crack, created by Kai Kronfeld of Nosh This out in San Francisco. I love bacon! I remember my first chocolate with bacon experience. I was traveling for work in Kalamazoo, MI. back in 2007/08', when I stopped in at a quaint sandwich shop and spotted an array of unique chocolate bars by Vosges. I agonized over which to try. I went with Mo's Milk Chocolate Bacon Bar after I was told that it was the most popular. I was blown away by the concoction! I can only imagine how intoxicating the Vosges factory smells with dizzying wafts of chocolate and bacon! Chicago is serious about their bacon. The location of an annual bacon extravaganza which takes place in April. Start planning your trip for Bacon Fest, Chicago 2013! Did you know that there is a Royal Bacon Society ?! Also, for this weekend only, you can order a limited edition Bacon Skyline T-shirt at ThinkGeek.com

I decided to utilize the bacon and leeks I had in my fridge to try and make some savory scones. I followed a recipe by a wonderful blogger, The Baker's Daughter. I of course modified a couple of things, but the most important take away lesson for making delicious, flaky scones is to be sure that your butter is cold. Cool the leeks and bacon completely, and throw the dough in the fridge or freezer for a few minutes if it becomes too warm. I also made some mini scones, and used muffin tins for baking. I omitted the cheese as there is already plenty of fat from the bacon...but, I am sure it would be a great addition! Your kitchen will be smelling like fall after making these delicious scones!


Ingredients

2 cups all-purpose flour
2 tablespoon white sugar
1 teaspoon baking powder
¼ teaspoon baking soda
½ cup cold butter, cut into small cubes
2/3 cup milk
3/4 cup chopped leeks
4 rashers of bacon
1 cup cheddar cheese, grated (optional) 
1/4 teaspoon cracked black pepper

Preheat oven to 400 degrees Fahrenheit.  Line a cookie sheet with parchment paper, or grease muffin tins.

Cook your bacon until it is slightly crispy.  Remove the bacon from the pan and drain the fat.  Cook the leeks in the same pan in 1 tbsp of the bacon fat, adding a 1/4 tsp of cracked black pepper.  Cook the leeks until they are soft and slightly translucent.  Set aside to cool.  In a bowl, mix together the flour, sugar, baking powder, and baking soda. Add the cold butter to the flour mixture, and using your fingertips blend until a coarse crumb forms.  Add the milk and mix until just combined.  Dough will be sticky. 
Add bacon to the scone mixture, along with the leeks and a 1/2 cup of the cheddar cheese.  Gently fold in all the ingredients and turn out the dough onto a well floured surface.  Pat the dough into a 1/2 inch thick round and using a cutter, cut out 6 circles.  Place in muffin tins (or baking sheet) and sprinkle the tops with the remaining 1/2 cup of cheddar cheese (optional). For the mini scones, I formed them with by hand and placed in the mini tins. You may want to place dough in the freezer for a few minutes if the dough becomes too warm while the scones are baking. 

Bake for 15-20 minutes or until browned on the tops and bottoms. Store in airtight container in the fridge. Reheat before eating.
mmm..bacon!

leeks cooking in bacon fat

delicious combination

nice, crumbly dough

mini scones!

 Look at that bacon!


Enjoy! Happy Bacon Day!!


Friday, August 31, 2012

Peanut Butter and Cocoa Almond Spread Cookies!


I recently discovered Trader Joe's Cocoa Almond Spread when searching for some Nutella to make these cookies. It is similar to Nutella, except made with almonds, and may even be better! These cookies are simply just... YUM! I adapted the recipe from Simply Scratch. I replaced the oats (not a fan) with almond meal, and was very pleased with the results. I also added in some vanilla extract in addition to using the Cocoa Almond Spread. Next time I will throw in some chocolate chips for added decadence! Drop a dollop of raspberry jam in the middle, and these very well could become one of my top most craveable cookies of all time!

Ingredients

1 egg
1/4 cup brown sugar
1 tablespoon milk (I used soy)
1/2 teaspoon vanilla extract
1/2 cup peanut butter (the crunchy works really well here!)
1/2 cup cocoa almond spread or Nutella
3/4 cup almond meal
1 teaspoon baking soda
1/4 teaspoon salt

Preheat oven to 350F. Line baking sheet with silpat or parchment paper.  In a large bowl, mix together egg, brown sugar, milk, vanilla, peanut butter, and almond spread. Add in salt, baking soda, and almond meal. Drop heaping teaspoons onto the prepared pan. Shape into a ball for nice, round cookies. Bake for 8 minutes. This timing was impressively exact! As difficult as it may be, let the cookies cool for 10 minutes before transferring from cookie sheet to serving plate, or mouth! 


Excellent alone by the spoonful!

mixing!

ground up almonds

peanuts, chocolate, and almonds, oh my!
The perfect cookie!

Enjoy!!!


Wednesday, August 15, 2012

Julia's Beef Bourguignon


Here it is! The final recipe for the JC100 blogger event honoring the great, late Julia Child! Her famed Beef Bourguignon! She would've turned 100 today. Forever an inspiration, her legacy lives on. Participating in this event has been fun, and I have more of an appreciation for French cooking, Julia, and keeping up with regular blog posts! I wonder what Julia would have thought about the use of technology and how it can easily bring so many people together sharing experiences cooking up her dishes around the world! Truly incredible. Every dish was unique in itself, just like Julia. Once my waistline recovers , I will continue experimenting with French cuisine, perhaps delve more into desserts (of course).

Beef Bourguignon is one of the more complicated dishes. It takes time, and there are many steps, but very delicious, making it well worth the time and effort.  I started the dish on the stove and transferred to a slow cooker. I will be invested in a nice cast iron casserole dish and make this again to compare. Though, I will wait until the winter. This dish is heavy and will heat up your kitchen! I did not cook the mushrooms and onions separately like the recipe suggests due my own time constraints. I added them right into the slow cooker with everything else. Although the dish still came out delicious, I would make Julia's mushrooms and onions next time around. I also added in some fingerling potatoes and fresh tomato which added some color and additional flavor. Enjoy!

Ingredients
(serves 6 people)

6oz chunck O bacon
1 tablespoon olive oil
3lbs. lean stewing beef, cut into 2" cubes
1 sliced carrot
1 sliced onion
1teaspoon salt
1/4 teaspoon pepper
3 cups full-bodied young red wine (Chianti is suggested)
2 to 3 cups brown beef stock or canned bouillon
1 tablespoon tomato paste
2 cloves mashed garlic
1/2 teaspoon thyme
crumbled bay leaf
blanched bacon rind

18 to 24 small white onions, brown-braised in stock (recipe found on page 483 of Mastering the Art of French Cooking by Julia Child)
1lb. quartered, fresh mushrooms sauteed in butter (recipe found on page 513 of Mastering the Art of French Cooking by Julia Child)
Preheat oven to 425F
Saute the bacon in the oil over moderate heat for 3 minutes until lightly brown. Remove, and sautĂ© the beef after drying with paper towels (the beef will not brown if it is damp). sautĂ© a few pieces at a time in the hot oil and bacon fat until nicely brown. Add to the bacon. In the came pan, sautĂ© the vegetables. Pour out the SautĂ©ing fat. This is where you would return the beef and bacon to the casserole, toss with salt and pepper, and lightly coat with flour. I left in the sautĂ© pan and did this. You then put the casserole (or sautĂ© pan) in a preheated over for 4 minutes. Toss the meat and return to the over for 4 more minutes (this brown the flour and covers the meat with a nice crust). Remove casserole and turn down the heat to 325.

Stir in the wine, and enough stock to just cover the meat. Add tomato paste, garlic, herbs, and bacon rind (I omitted the rind). Bring to a simmer on stove top. Cover and place in over for 21/2 to 3 hrs. I placed everything in the slow cooker on low heat for 3hrs. Meat is done when fork easily pierces the meat.


Bacon!

A nice medley of mushrooms

beef in bacon fat

Beautiful Bourguignon

Bon Appétit


*Excerpted from Mastering the Art of French Cooking by Julia Child. Copyright © 1961 by Alfred A. Knopf. Reprinted with permission from the publisher Alfred A. Knopf, a division of Random House, Inc.


Monday, August 13, 2012

Julia's Scallops Gratinéed


The 100th anniversary of Julia's birth is fast approaching on the 15th! Many area restaurants are serving up some of Julia's classic dishes. I recently enjoyed an incredible sole meunière dish over at Clio.

Sole Meunière by Chef Douglas Rodrigues of Clio
Recipe number fourteen for the JC100 blogger event is Scallops GratinĂ©ed with wine, herbs, and of course...butter (Coquilees St. Jasques a la Provencale)! Oh, and cheese, butter....and more butter! The minced onions, shallots, and garlic cooked with wine in this recipe makes for a very delicious sauce. Be sure to have a nice baguette or favorite bread with this dish for soaking it all up!


Ingredients

1/3 cup minced yellow onions
5 tablespoons butter (!!)
11/2 tablespoons minced shallot, or green onions
1 clove minced garlic
11/2 lbs. washed scallops
salt and pepper
1 cup flour
2/3 cup white wine, or 1/2 cup dry vermouth and 3 tablespoons water
1/2 bay leaf
1/8 teaspoon thyme
1/4 cup grated swiss cheese

Cook onions slowly in butter for 5 minutes or so, until tender and translucent, but not browned. Stir in the shallots or onions, and garlic, and cook slowly for 1 minute more. (Your kitchen will small incredible right about now). Dry scallops and cut into 1/4 inch thick slices. Just before cooking, sprinkle with salt and pepper, roll in flour, and shake off excess. Saute scallops quickly in very hot butter and oil for 2 minutes to brown them lightly. If you have people waiting to eat these, the aroma will make it very difficult for them to wait for this dish. I highly recommend serving them a cheese plate ahead of time to prevent someone from coming in the kitchen and burning their fingers in hot oil and butter when they try to steal a scallop! Next, pour the wine (or vermouth) and water, into the skillet with scallops. Add the herbs and cooked onion mixture. Cover and simmer for 5 minutes. Uncover, and if necessary, boil down the sauce rapidly for a minute until it is lightly thickened (I let it boil down for a few minutes). Spoon the shallots and sauce evenly into shells, or individual casserole dishes. Sprinkle with cheese and dot with butter (!). Run under moderately hot broiler for 3 to 4 minutes to heat through, and to brown the cheese lightly. Enjoy!!!


Did I mention that there was butter in this recipe?!


Bon Appétit!

 *Excerpted from Mastering the Art of French Cooking by Julia Child. Copyright © 1961 by Alfred A. Knopf. Reprinted with permission from the publisher Alfred A. Knopf, a division of Random House, Inc.


Nomsense is on Facebook!